Now it’s time to get the penguin connected to Internet. Before we start I think would be useful for you to know what kind of user you are.
User A: you connect to the web with a cable, and in this case you don’t need to read this post
User B: without knowing it you are lucky enough to see your driver automatically recognized by Ubuntu. This is usually the case with Realtek and Ralink chipsets.
User C: you own a wireless adapter with a Broadcom chipset or even worst a b43xx series; that is unfortunate as this post will work for most of the wireless adapter but certainly not for the ones equipped with a Broadcom chipset. Now this is not for being mean, but when you have a Broadcom chipset you need to follow another way to make your card working. This way involve to use additional software such as b43-fwcutter, you need to spend sometime on Internet finding the solution of any other problem, and quite possibly you have to write few lines of command in your terminal windows. I had a Belkin adapter with a b43xx chipset, and after long researches, close encounters of the third kind with the command line, and perhaps for the fear of being too stupid I decided to buy another adapter all together.
User D; I like you. I do so because you are the one who’s going to keep reading this post.
So first thing to do is to find out what kind of user you are. I have never had the pleasure to be an User B, but I know that in this case the wireless utility automatically starts; all you have to do is choose your network and enter your WPA key (as you do in Windows). You should see something going on on the top right corner of your screen next to the speakers.
We then need to find out if you are a soon happy User D or a for quite a while miserable User C (look User C perhaps you won’t have any problems at all, I’m just warning you). To do this we have to run a command from the terminal window. I won’t talk at all about commands and terminal at this stage so just believe me.
Top left corner of the screen an click on
Applications – Accessories – Terminal
or alternately press
Alt+F2 and write gnome-terminal
I actually prefer the latter as it is much faster. Alt+F2 is like the Run command in Windows under the Start menu. The command will be there next time waiting just to be scrolled from the drop down menu. Just as Windows.
Now you must see a white windows with at top something like:
username@desktopname:-$
As I said this is not the time to explain the terminal window and the command, and as I said just trust me and write
lspci and then hit Enter
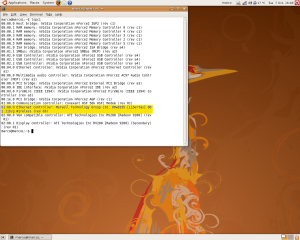
You can see in the picture a yellow box meant to highlight the part we are interested in;reading that I acknowledge the fact that my adapter is equipped with a Marvell chipset. So I am a User D, if so are you keep reading.
If you red the previous post you have downloaded already the Ndiswrapper packages. Ndiswrapper will allow you to use Windows Wireless Drivers under Linux. If you haven’t you may want to do it now:
NOTE: I ASSUME YOU USE UBUNTU HARDY WITH i386 ARCHITECTURE (32 bit processors), IF NOT CHOOSE YOUR OWN VERSION BEFORE TO DOWNLOAD THE PACKAGES link
ndiswrapper common – ndiswrapper utils – ndisgtk
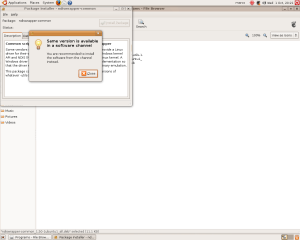
Install them in the same order that I listed above. To do that simply double click on the file, whatever folder you downloaded it into Ubuntu. For all them you will probably see the following message
Ignore it clicking close. You can update the package if needed once you established the connection. If the case Ubuntu will look after all the procedure.
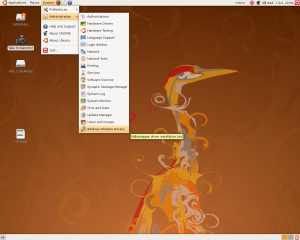
Once installed all the packages, go to
System – Administrator – Windows Wireless Drivers (this voice has been added by Ndiswrapper)
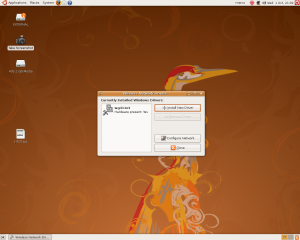
Click and you’ll be asked to type the password which the same you input during the installation. Do that and this what you should see
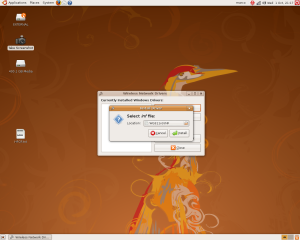
Click Install New Driver. At this point the system is asking you to pick the file with extension .inf which held the information about your driver. This file is located in the partition where Windows in installed; this will be either in the folder
Program Files-name of the adapter folder – driver – something.inf
in my case it was in
Windows-Inf-name of the adapter folder-driver-something.inf
It depends of course on the hardware instalation. Select the file click Open and then Install in the follow screen
If the file is correct that is waht you should see
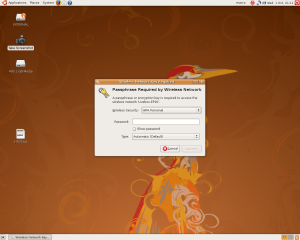
If not the screen will tell you you picked the wrong file. Click Close. At this point the little screens next to the speakers in the top right corner od the screen become two little point with something like a small comet spinning arround the points. That means Ubuntu is looking for all the networks available. In my case it found only my own network. And then the following scrren appeared immediately. In the case more than one network are found, you may need to click on the comet and choose your. In both cases the screen when you enter your WPA key appears
Keep the wireless security on Personal and type on Automatic. Enter the key and click Connect. Now at this point if everything is working, you should see the two points next to the speakers changing their colour from blue to green; when both are green you are connected and the points leave the space for the graph indicating the strenght of the signal
